Video Creator’s Channel SonarCreep
Hello Everyone And Welcome Back To The Channel
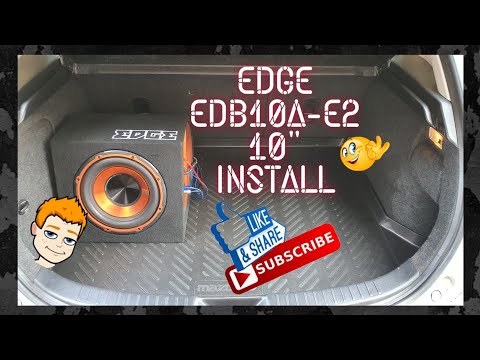
Yes it’s a subwoofer. The Bose one in the system is absolutely poo. It’s just not enough of anything not it doesn’t go low enough it doesn’t go loud enough it just you can’t feel it enough it’s just not enough so following on from the last video of look at these idiots no behave dogs trying to do a video here ruining everything Jesus and where was I yeah so following on from the last video, which is obviously the install of the radio it’s just the the base part of it. If the system itself not the head unit is is just not enough, so i’ve bought this little 10 incher and that’s all you need it’s going to be well powerful enough and also i’m keeping the original sub so when this goes in the boot which. Is where the original sub is I’ll end up with double double subs basically um and if I get any sort of wave cancellation from the from the other sub, then I’ll disconnect it, but I’ll try it out with first and just see how we get along so yeah.
Im Going To Open This Up And Then
see what’s inside okay. You’ll never guess what’s inside yeah. It’s a sub weird that isn’t it weirdo that’s exactly what I bought so that’s what I got no idea what that is. I’m sure we’ll find out the usual manual and a sticker. The sub itself.
I See Theres Nothing Else In There Im
gonna need two answers for this just bear with me okay see Max likes the smell of it nope. He prefers the box that’s the difference between a dog and a human oh No he likes. The soap No He’s keen he thinks of glue, but you know it’s not a bad thing. I suppose if that’s what you did so we’ve gone for the 10-inch version because the 12-inch will just take too much room up in the boot and I run the studio on eight inch subs and it’s more than enough so 10 inch more than enough. It’s powerful enough to make the car dance so that’s that’s what we’re gonna install today.
- sub end way audio
- run studio inch subs 10
- head unit end sub
- inch subs 10 inch powerful
- subwoofer bose absolutely poo just
We Had To Buy The Wiring Kit
um obviously because it just comes as is with this little thing here, which is obviously for the high inputs um onto the amp side, which is here because I don’t know if you know or no or don’t know but this particular model comes with its own amplifier so you’ve got your frequency knob, which is basically a crossover you’ve. got your bass boost I’m not too sure that’s going to be We’ll find that out and obviously you gain so how loud you want it to be yeah We don’t want it on the max to be fair. We want we want to blend this in from the driver’s seat so we’ve got the right amount. We don’t want to be overpowering everything else these are your your low inputs, which is your auxiliaries from your stereo so your live feed basically and then you’ve got your input for your high inputs, which is what this little cables for goes in there, but we’re not going to be using that one. Then we’ve got your amp fuse.
Weve Got Your 12 Volt Feed.
We’ve got your remote wire which is basically the power on off and your ground so that’s it nice big base port and get your fist. In that’s plenty big enough and yeah if you want to know the specs. I think they’re on the back here. Let’s have a look turn it over and these are the specs of the machine.
So 750 Watts, But We Know Its Not
750 watts. 250 is probably about right We’ve got a frequency range of down to 30 hertz to 17 1. 7 K. Now you’d never go up to 1. 7 k.
Thered Be No Point Because Your Mid-Range
speakers cover all of that range. So we’re only going to be covering from the low 30 to anything from 60 to 100 Hertz, but we’ll check we’ll we’ll see which whereabouts in that frequency range It sits really well. You won’t get it over the phone obviously what it sounds like because the phones don’t pick up based in that way but I’ll set it to an engineering standpoint. Then you know that can be your start point for yourself. If you think about getting one but every car is different because of the shape and stuff so but you know it’s a starting point so let’s get in let’s go and install it man come on let’s go okay.
So This Is The Wiring Kit That We
go We’ve got all the terminals we’re going to need we’ve got a 10 gauge kit and which is what we need for this for the to run this amp. So 10 gauge is more than enough. There’s a 40 amp fuse in there we’ve got the audio cables. Some um cable tidy stuff. If need be the only thing this is not go which is disturbing me like oh no there it is all right if the i thought it didn’t come with the remote wire, but there it won’t.
Is Okay That Is Literally Everything Then Weve
got everything we need so let’s go and tear the car apart and get the hard bit over with which is the routine routing the 10 gauge from the battery through the car that’s the output okay So we’re going to grab a 10 mil and take off the positive terminal off the battery. Like this obviously you don’t want to do any of this work with the battery connected then we’re going to take the glove box off. This one’s dead easy on the monster. In particular, unless you just move the clamps aside and it just pulls off literally dead easy now luckily. The Mazda Mark twos have the hole for the Americans um side for the actual steering rack, so it’s a little plastic cap there so i’ve drilled through that on the other side of that as a.
- subwoofer
- bose
- bass
- speakers
- amplifier
Rubber Grommet So Ive Drilled Through
that now I’m going to place the 10 gauge positive wire through the grommet and through the little plastic cap that I’ve drilled a hole through you can’t really see it because of the angle of the camera at the minute, but you know so you saw what the hole was so I’m gonna pull it through and just leave just enough at the front. So we can hook it up later and what I decided to do is a little um flat plastic airway. I rooted the cable behind it and then routed this to the side of the battery. Here we go there we go it was a better fit. I can get there.
I Can Make Sure I Can Get
the battery lid back on so leave that ready to hook up later and we’ll just route the wires or this. wire as best we can so it’s all out the way obviously making sure it’s not gonna chafe on anything that’s sharp take this last bit of trim off there we go we should pop off there we go and then we’ll pull this trim off as well. While we’re at it. Then we can slope it down the side there Mazda panels to pull off are quite easy to prefer. I was expecting this whole bit to be a bit of a faff, but it it went together quite easy to be honest.
Didnt Take That Long At All So Were
going to root it under the carpet here Let’s get this little carpet sticker out of the way. We go pull that aside and just plumb it down there with the rest of the wiring and harnesses again, making sure it’s not touching any sharp things any sharp. surfaces and what we’re gonna do next we’re gonna pull the seat belt plastic cover off so again it’s just they literally just pop out it’ll just take a bit of the weather to weather strip away, so we can get access again use your plastic tool as often as you can on plastic stuff. If you start using screwdrivers. It instantly just messes up the plastic and it looks horrible afterwards and plus you can see then you’ve tampered with certain parts of the car not a good look not very professional, let’s get rid of this clip this last clip out there we go I’ll go around the other side and we’ll pull the floor one off there we go and then we’ll put a bit of the weather off.
Were Going To Need To Undo
that back one as well so we’ll get the rest of this. One off it should just pop off here we go down the bottom There we go now She combs another little carpet fixer get that out and carry on with the wire tracing get it all the way to the back and we’ll see where the sub is again just keep checking what you do make sure you’re not placing the wire anywhere the sharp metal that could chafe into the wire because the last thing you need is that anything out even though it’s fused at the battery and it’s just um you know just good practice nice little cavity there and then we need to get it through this plastic bit. Put the seat down and then that’s it just pull it through it roughly with where the sub is going to be make sure you’ve got enough length left and so we can get to the sub. fine and it’s in its final position. Now we’re going to plumb in the remote wire.
Like So Again Well Route It
next to the actual 10 gauge live wire Keep it all nice and neat it’s going in the same the same way again just going to leave enough length at the stereo end the head unit end and enough this sub end up this way and then this is your audio cable and I decided to do it backwards this time so the other cables out and then pushing it through this side. So I’m just making sure that’s cleared of any any sharp metals because again you don’t want to use everything either to be fair. This was the only mistake. I made with the install was the RCa terminals that I’m pulling through I should have pulled through the other ones and left them up by. The um by the sub because they had the l shape angles, but not that it matters swings around about something to look out for when you start doing it yourself so again just plumbing it through exactly where the other wires went now normally you’re not supposed to root your audio cables next to the live wires and with fear that you might get some interference coming through the signal and if you’re having them next to each other.
We Didnt Get Any Interference Whatsoever, But
if you do happen to get it. Then they suggest that you run the audio cable literally a lot along the opposite side of the car so something to think about right so that’s all in there. Let’s got the right length of the the front and the back for everything just popping all the trim back on and then we can start hooking things up so we’ll lay that there and take the stereo out, which is basically just pop the top like so again sorry about the angle. The head can must have dropped a bit and then just the two.
Summary
Following on from the last video of look at these idiots no behave dogs trying to do a video here ruining everything Jesus and where was I? We’ve gone for the 10-inch version because the 12-inch will just take too much room up in the boot . Max likes the smell of the soap No. He’s keen he thinks of glue, but you know it’s not a bad thing. Max prefers the box that’s the difference between a dog and a human oh No he likes the soap. No he’s keen to think of glue. He likes glue. Max likes it. It’s more than enough to make the car dance so that’s that’s what we’re gonna install today. We had to buy the wiring kit um obviously because it just comes as is with this little th . It just came as is. It just comes with this subs and it’s more subs. The wiring kit. We’re going for a 10-in-built subs….. Click here to read more and watch the full video